Configuring Redis on EC2 for Seamless Local and Remote Access
Redis Configuration on EC2: Local and Remote Access Made Simple - Explore a Firebase Alternative


Redis emerges as a cost-effective and best Alternative to Firebase, devoid of subscription constraints, making it an appealing choice for developers seeking budget-friendly yet powerful database solutions.
Why Redis:
Redis surpasses traditional databases with its lightning-fast in-memory architecture, making it perfect for real-time applications. Its advanced caching and flexible structures offer unmatched speed, scalability, and customization. From messaging to gaming, e-commerce to analytics, Redis transforms data processing, empowering developers to create dynamic, responsive systems.
Real-time Use Cases:
Redis excels in real-time applications across messaging, gaming, and e-commerce. Its pub/sub feature enables chat and event streaming. Sorted sets and geospatial indexes enhance location-based services and analytics. E-commerce benefits from dynamic pricing and inventory management. Redis also boosts web app performance through caching, driving innovation in real-time data processing.
How it works?
Redis operates on a simple yet powerful key-value pair storage model. Data is stored in memory, enabling lightning-fast access and retrieval. Each key can hold various data types, including strings, hashes, lists, sets, and sorted sets, providing flexibility in data representation. With its in-memory architecture and efficient data structures, Redis optimizes performance for real-time applications, ensuring swift data processing and seamless scalability.
Configuring Redis Database in EC2:
Setting up Redis on an EC2 instance and accessing it locally involves a few steps. Below is a guide to help you through the process:
- Launching an EC2 Instance:
Begin by launching an EC2 instance.
Ensure that in the security group settings, port 6379 is added to the inbound rules to allow incoming connections.
Connecting to the EC2 Instance:
- Connect to your EC2 instance using SSH or any preferred method.
Configuring Redis:
Update the package index on your EC2 instance:
sudo apt updateInstall Redis server:
sudo apt install redis-serverTo allow Redis to accept external requests, access the Redis configuration file with your preferred text editor. In my case, I've selected vi for editing.
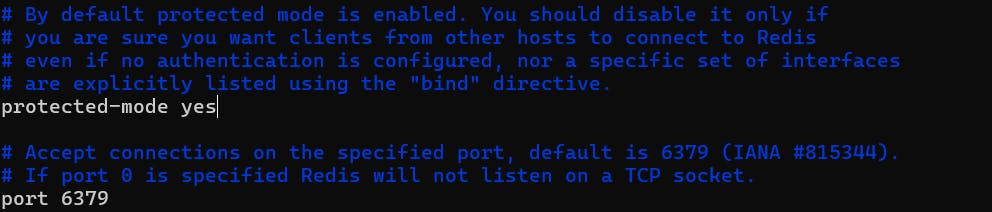
sudo vi /etc/redis/redis.confWithin the configuration file, find the line "bind 127.0.0.1::1" and comment it out. By default, this line is uncommented to only accept requests from localhost. To allow requests from outside, we need to comment out this line.

#bind 127.0.0.1 ::1The default protected mode in Redis is "yes," restricting connections to localhost for security. To enable external access, switch protected mode to "no" in the configuration.
protected mode noRestart the Redis server to apply the configuration file updates.
sudo systemctl restart redis.serviceVerify the Redis service status.
sudo systemctl status redis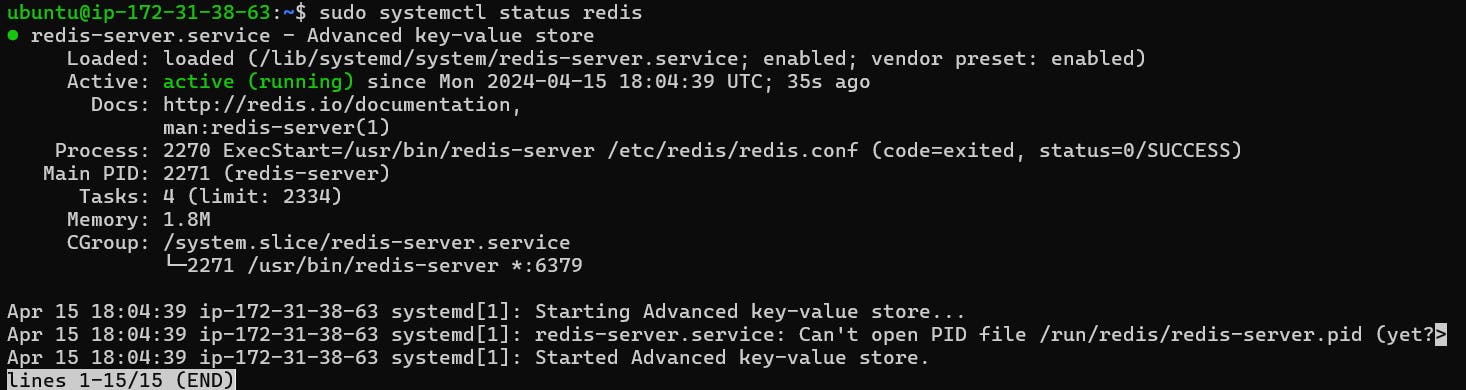
Testing Redis
To test if Redis is functioning correctly, connect to the server using
redis-cliredis-cliOnce in the Redis command line
127.0.0.1:6379>, ping the serverpingYou should receive a response of
pong.
You can establish key-value pairs in the database using the
syntax
set <key> <value>set key1 "hello"Retrieve the value of a specified key using the "
get" command with the syntax "get <key_name>".get key1
Delete keys as needed using the syntax:
del <key_name>del key1
Accessing Redis Remotely:
The main prerequisite for accessing Redis from a remote system is having redis-cli installed. It is essential for accessing the remote Redis database.
Download the Redis command-line interface (CLI) from the Redis repository and install the .msi file on your local Windows system.
Ensure that you configure the environment variables on Windows to point to the location of the Redis CLI executable.
Open the command prompt and navigate to the directory where Redis is installed (e.g.,
C:\Program Files\Redis).Connect to the Redis server using the EC2 instance's public IP and port 6379:
redis-cli -h <EC2_public_IP> -p 6379You can now execute various operations such as setting and retrieving keys, and setting keys in the database using "
set key value"
and clearing all data in the database with "FLUSHDB."

For additional commands to interact with the remote Redis database, refer to the documentation at redis.io