Automating Spring Boot Deployment with GitHub Actions: Docker Image Build and Push

🚀 Passionate about cloud and DevOps, I'm a technical writer at Hasnode, dedicated to crafting insightful blogs on cutting-edge topics in cloud computing and DevOps methodologies. Actively seeking opportunities in the DevOps domain, I bring a blend of expertise in AWS, Docker, CI/CD pipelines, and Kubernetes, coupled with a knack for automation and innovation. With a strong foundation in shell scripting and GitHub collaboration, I aspire to contribute effectively to forward-thinking teams, revolutionizing development pipelines with my skills and drive for excellence.
#DevOps #AWS #Docker #CI/CD #Kubernetes #CloudComputing #TechnicalWriter
Introduction:
In the rapidly evolving landscape of software development, automating the build, test, and deployment processes is essential for efficient delivery. This tutorial will guide you through setting up a Continuous Integration and Continuous Deployment (CI/CD) pipeline for a Spring Boot Maven application using GitHub Actions. We will leverage Docker for containerization and Docker Hub for image management.
Prerequisites:
Before diving into the setup, ensure you have the following:
A Spring Boot Maven application hosted on GitHub.
A Docker Hub account for storing Docker images.
Basic understanding of Docker, Maven, and GitHub Actions.
Technology Stack:
Spring Boot: Simplifies building production-ready applications.
Maven: A build automation tool for Java projects.
GitHub Actions: Automates workflows directly from GitHub repositories.
Docker: A containerization platform.
Docker Hub: A cloud-based repository for Docker images.
Setting Up GitHub Actions
- Setup GitHub Actions Workflow:
Open your GitHub repository in your web browser.
Navigate to the "Actions" tab.
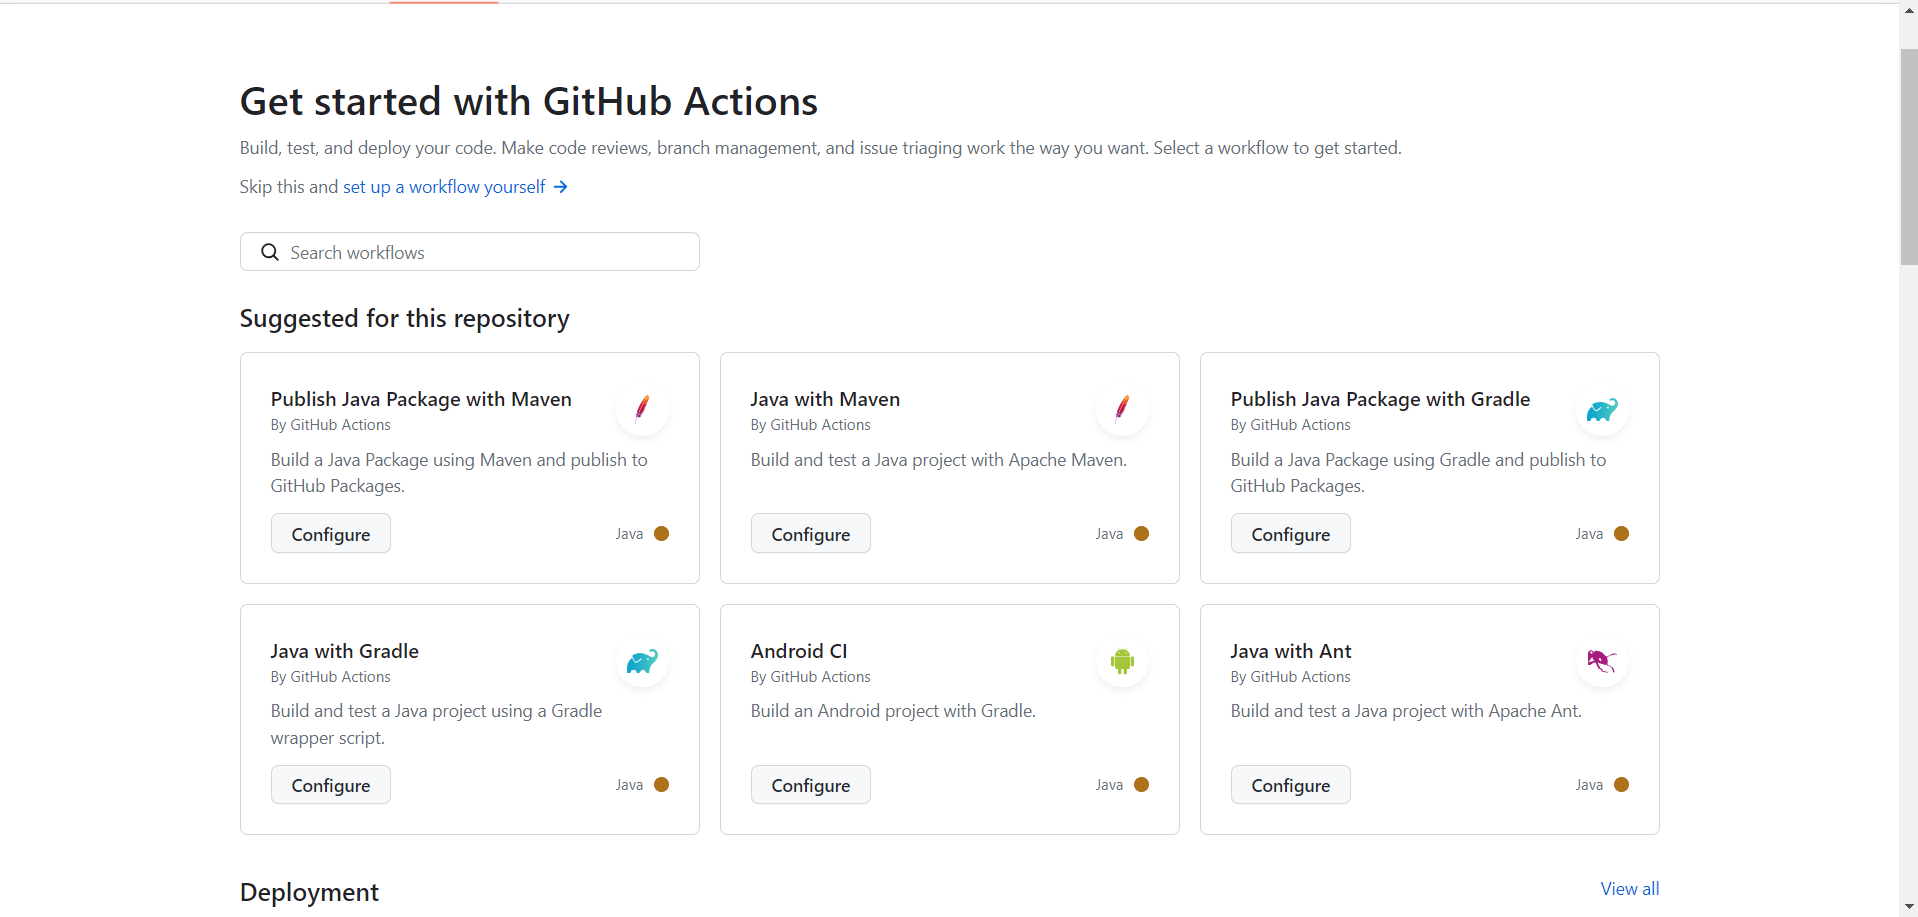
GitHub will suggest templates based on your project. Look for the "Java with Maven" template and click on "configure"
Once configured, go back to your repository. You'll notice a new folder named .github/workflows has been automatically created.
Inside this folder, you'll find a pre-built YAML file named maven.yml. This file serves as a template for your GitHub Actions workflow.
You can modify this YAML file according to your project requirements. Define jobs for building, testing, building Docker images, and pushing to Docker Hub within this file.
All your GitHub Actions workflows will depend on this YAML file. It serves as the central configuration for automating your CI/CD pipeline.
By following these steps, you can easily set up and customize your GitHub Actions workflow for your Spring Boot Maven project.
we can look into the maven.yml code
Certainly! Let's break down the code into smaller snippets and explain each part:
name: Implement CI/CD Flow
- This line sets the name of the GitHub Actions workflow. In this case, it's named "Implement CI/CD Flow". you can modify not a problem
on:
  push:
    branches: [ "main" ]
  pull_request:
    branches: [ "main" ]
- This section specifies when the workflow should be triggered. In this case, it triggers pushes to the "main" branch and pull requests targeting the "main" branch.
jobs:
  build:
    runs-on: ubuntu-latest
- This section defines the "build" job, specifying that it will run on any environment, including Linux, Windows, etc. For this demonstration, we've chosen to run it on an Ubuntu environment, specifically using the latest available version.
steps:
    - uses: actions/checkout@v3
The initial step involves fetching the repository's code, achieved through the actions/checkout@v3 action.
You can find the documentation for this action here. The checkout action essentially clones the repository into the environment where the GitHub Actions workflow is being executed.
This step ensures that the subsequent workflow steps have access to the project's source code for building, testing, or any other required operations.
- name: Set up JDK 17
  uses: actions/setup-java@v3
  with:
    java-version: '17'
    distribution: 'adopt'
    cache: maven
- This step utilizes the actions/setup-java@v3 action to set up JDK 17, specifying the Java version, distribution (adopt), and caching Maven dependencies for faster builds..
- name: Build with Maven
      run: mvn clean install
- This step executes the Maven build command (mvn clean install), which compiles the project source code, converts it into .jar files, and performs tests to ensure functionality.
- name: Build & push Docker image
      uses: mr-smithers-excellent/docker-build-push@v6
      with:
        image: hemanthgangula/maven-github-actions-cicd
        tags: latest
        registry: docker.io
        dockerfile: Dockerfile
        username: ${{ secrets.DOCKERHUB_USERNAME }}
        password: ${{ secrets.DOCKERHUB_PASSWORD }}
Ultimately, this step employs the mr-smithers-excellent/docker-build-push@v6 action to construct and send a Docker image. It defines the image name, tags, registry, and Dockerfile path, and accesses Docker Hub credentials (username and password) stored as GitHub Secrets.
Note: Beforehand, ensure to create a repository on Docker Hub and modify the image:username/repository_name accordingly.
For comprehensive details, refer to the complete documentation.
You can find the full YAML code configuration on my GitHub repository for reference. Apologies for the lengthiness of this article.
Building the Docker Image: Creating the Dockerfile
At the root of your project, create a Dockerfile.
Define the environment and dependencies for your Spring Boot application in this Dockerfile. Below is a sample Dockerfile for this demonstration:
  DockerfileCopy codeFROM openjdk:8
  EXPOSE 8080
  ADD target/springboot-images-new.jar springboot-images-new.jar
  ENTRYPOINT ["java","-jar","/springboot-images-new.jar"]
Ensure that the name "springboot-images-new" specified in the Dockerfile matches the <finalName> in your pom.xml file. You can set the <finalName> in your pom.xml to match your desired artifact name. For example:
  xmlCopy code<build>
      <finalName>springboot-images-new</finalName>
      ...
  </build>
By keeping the names consistent between the Dockerfile and the <finalName> in the pom.xml, you ensure that the correct artifact is packaged and deployed within the Docker container.

we already configured the docker in the maven.yml in the before step
To test the GitHub Actions workflow:
Make changes to your main class or any file in the project.
Commit these changes to your repository.
GitHub Actions will automatically trigger and execute the workflow.
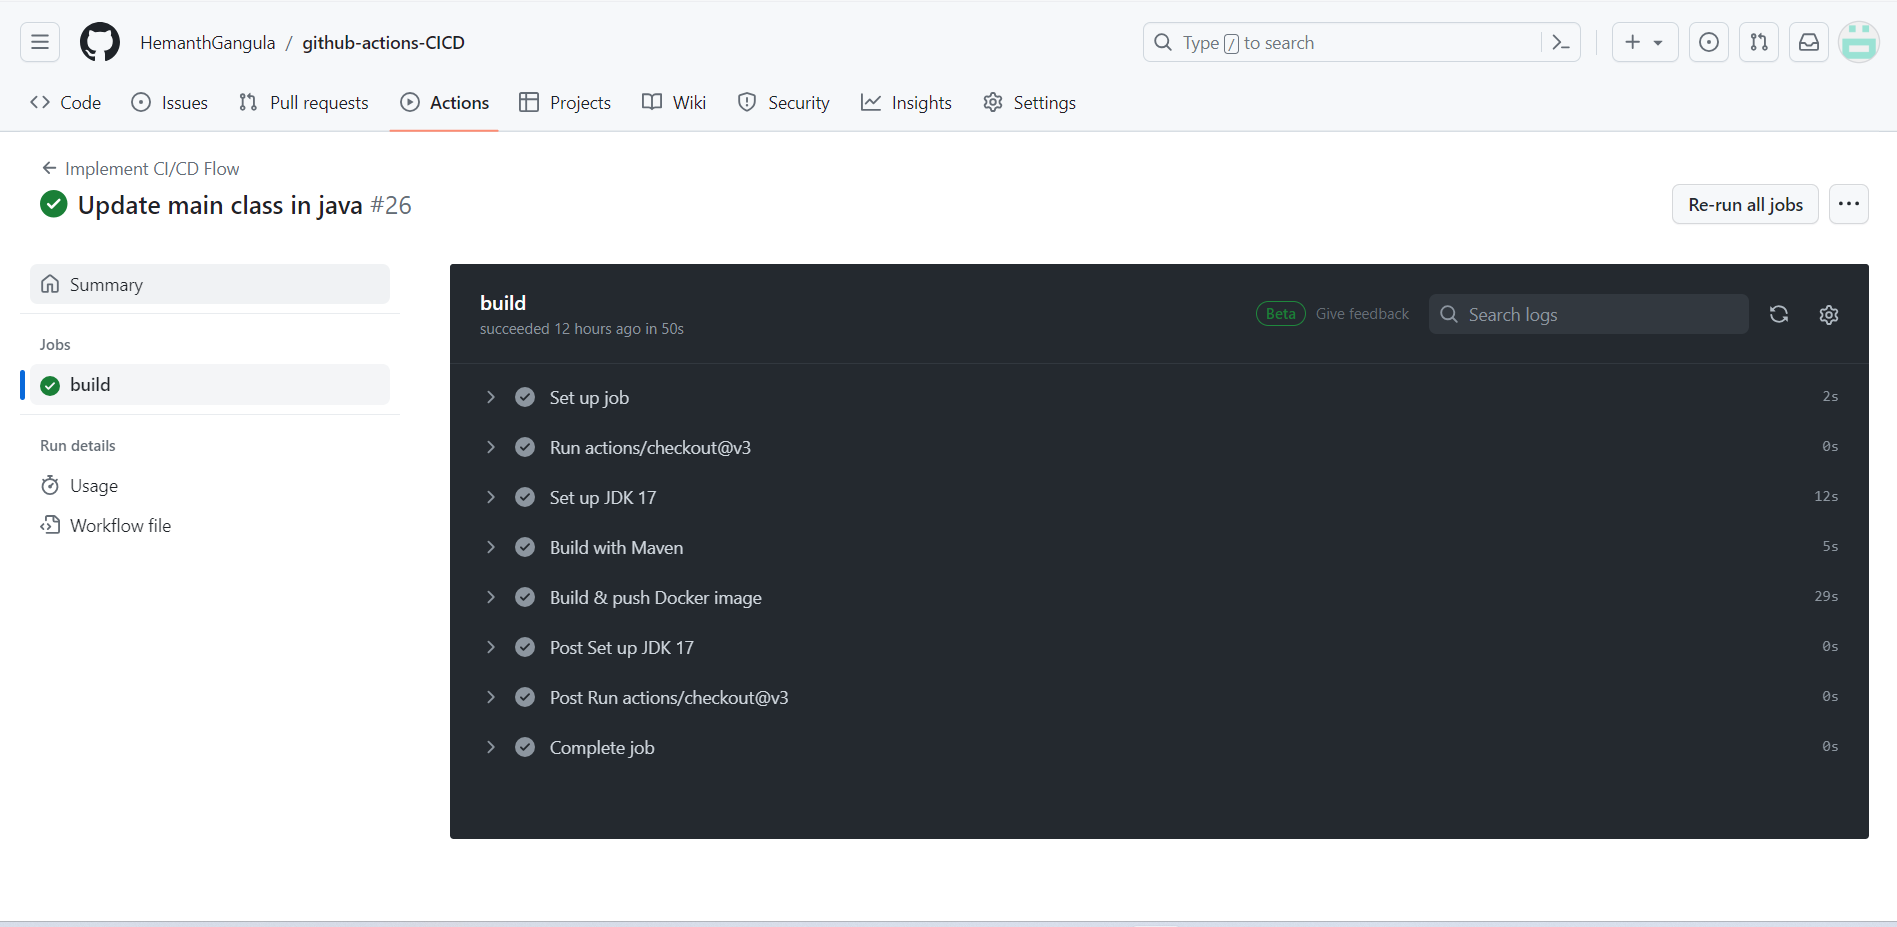
To check the workflow run status:
Navigate to the "Actions" tab on GitHub.
You'll see the workflow run associated with your last commit, displaying the name of the commit.
Click on the "build" option to view the details of the workflow run.
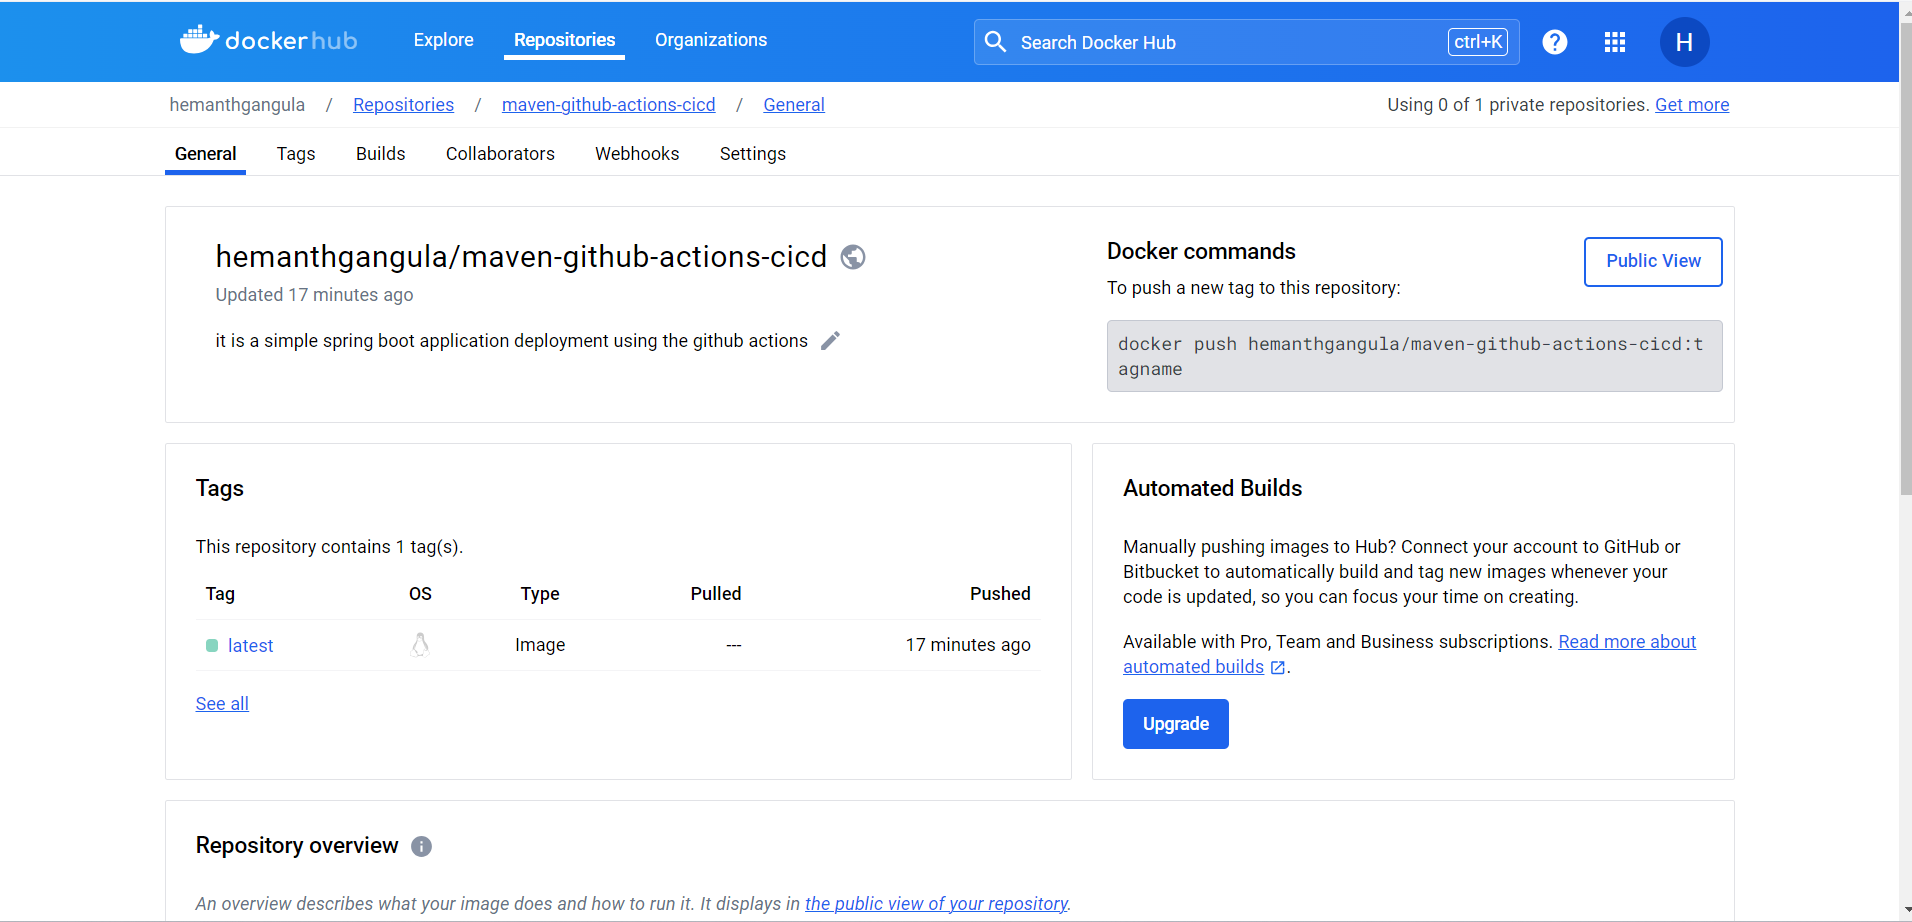
After successfully passing all build stages, your Docker image is created and stored in Docker Hub, reflecting the latest modifications based on your repository's configuration. You can navigate to Docker Hub to verify the existence of the image.
In my case, the image is stored in the following location: hemanthgangula/maven-github-actions-cicd. Feel free to refer to this link for further details.
Test the Docker image on the local system
Run the Docker image locally to ensure that the Spring Boot application runs properly.
Start the Docker Desktop application.
Open the command prompt.
Pull the Docker image stored in Docker Hub using the following command:
docker pull username/repo
Replace username/repo with your Docker Hub username and repository name.

- Check if the image is listed by running the following command:
docker images
This command will display a list of Docker images on your system. Your image should be listed here.

- Run the Docker container using the following command:
docker run -p 8080:8080 image_name
Replace image_name with the name of your Docker image.
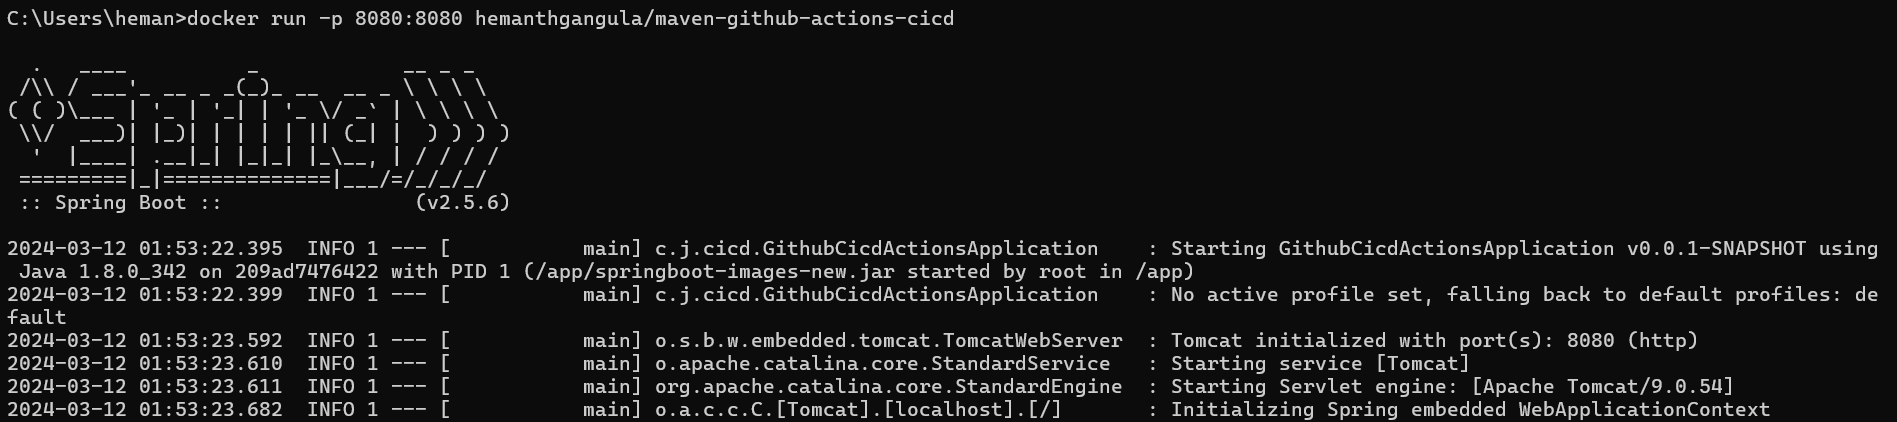
- Once the container is running, open your web browser and navigate to:
http://localhost:8080/welcome
Replace /welcome with the endpoint you want to test in your application.
- Verify that your application is working correctly by checking the response in your browser. If needed, modify your code and repeat the process to test the changes.
Following these steps will allow you to check if your Dockerized application is working correctly on your local machine.
Optimizing with Docker Multi-Stage Builds:
Ideology: Strive for efficiency and reduce overhead in the CI/CD pipeline by optimizing Docker images.
Implementation: Utilize Docker multi-stage builds to significantly decrease image size. By separating build and runtime stages, unnecessary dependencies are excluded, leading to a smaller footprint.
Example: Initial image size reduced from 544 MB to 212 MB, a 61% decrease, showcasing the effectiveness of the approach.

To access the Docker multi-stage implementation, please refer to my GitHub repository.